This article explains how to use the Pile Tagging tool to identify which piles you want measured after a full service drone flight is uploaded.
Tag Piles Measured by Drone #
Tag products on a site-wide image map prior to the results being generated. This step takes 15 minutes or less. Recurrent flights of a site will already have a majority of the piles auto-tagged with the correct product based off the previous flight. You will only need to confirm that the product tags are still accurate. The steps below will cover how to access the pile tagging screen, label products, and pile tagging best practices.
Access the Pile Tagging Tool #
If you’ve opted in to alerts, you’ll receive an email when your aerial is ready for pile tagging.
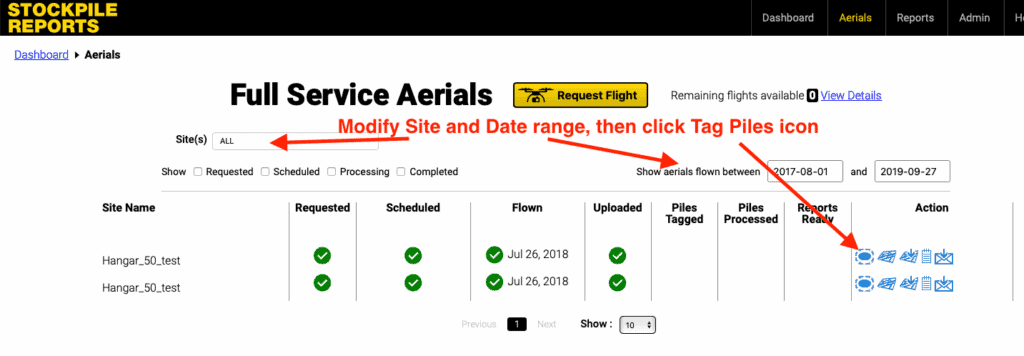
- From the web portal, go to the Aerials tab.
- Scroll to Full-Service Aerials and click the Tag Piles button next to the site you want to process.
Pile Tagging Interface #
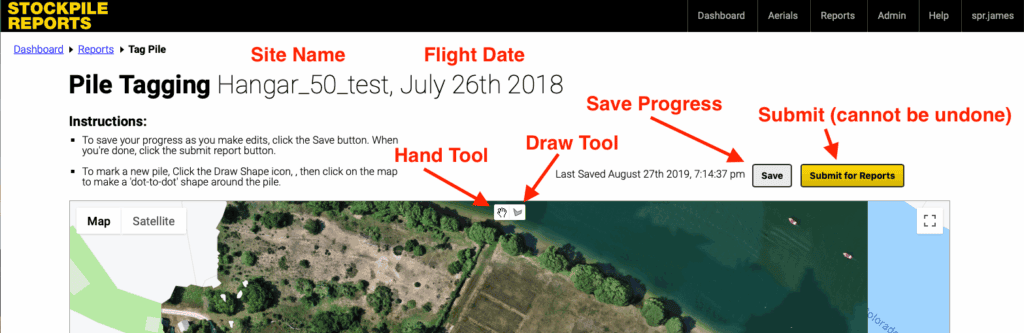
Site and flight date are displayed at the top of the screen. At the top center of the map is a Hand Tool and a Draw Tool. The hand allows you to pan around the map, move the pile outline vertices, and bring up the pile tag dialog box. The draw tool brings up a crosshair cursor that you can click on the map to add a new pile marking. Finally, use either the Save button to save your progress or Submit for Reports once pile tagging is completed.
Tagging the Piles #
The first time a site is flown for Stockpile Reports, all of the piles will be labeled as Other
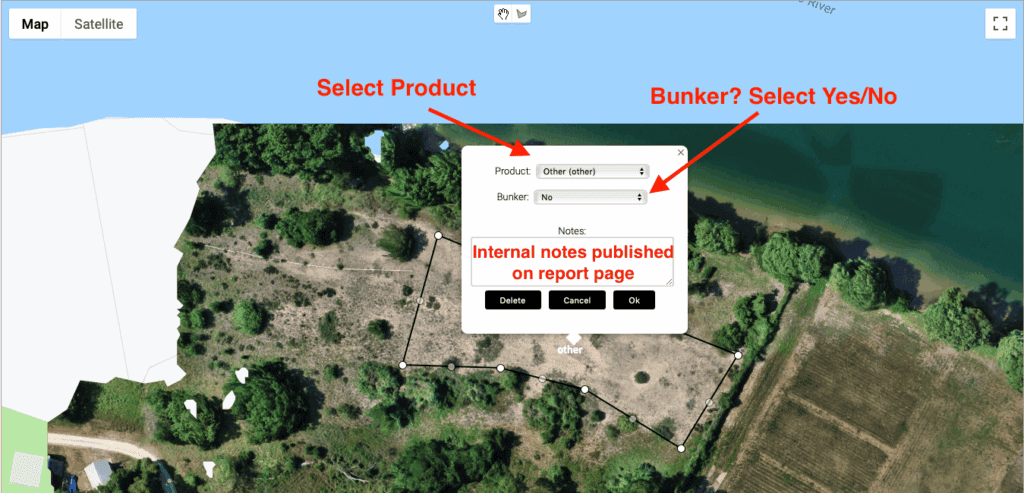
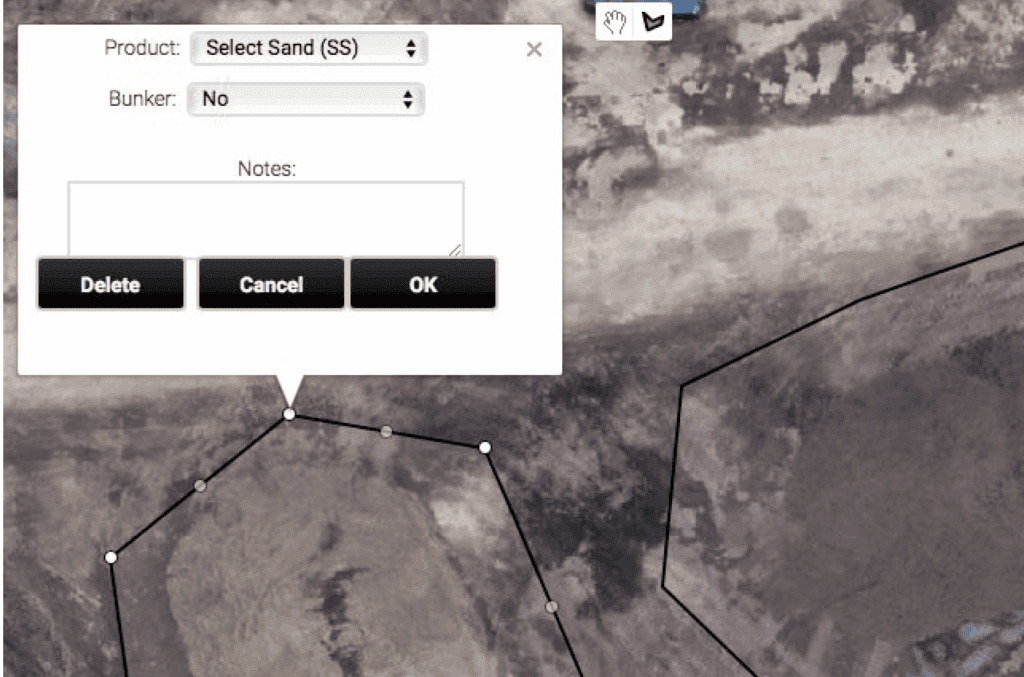
- Using the hand tool, click on the center of the pile outline or one of the outline vertices. A pile labeling dialog box will pop up.
- Click the Product drop down and select the product for the pile. (Note: If you don’t see the product listed, see Product Manager to create and assign products to your site)
- Select Yes on the Bunker drop down if the pile is a bunker.
- Type in any necessary notes (notes appear on the measurement report).
- Continue to tag all of the remaining piles on the map ensuring to save your progress with the Save button. Push the Submit for Reports button once you are satisfied with your markings.
Adjusting Pile Outlines #
We suggest leaving all the tagging outlines as is, however, there are occasions where the outlines need to be adjusted.
- Using the hand tool, grab the white dots to modify the shape of the pile outline.
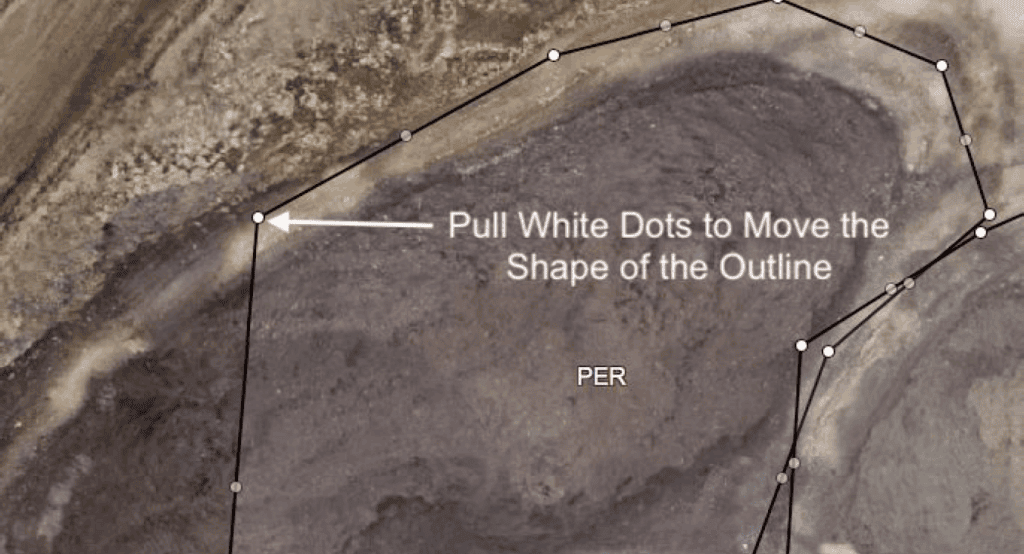
- A back button will appear with each change, click the button to undo an outline change.
- Continue to adjust the outline until you are satisfied.
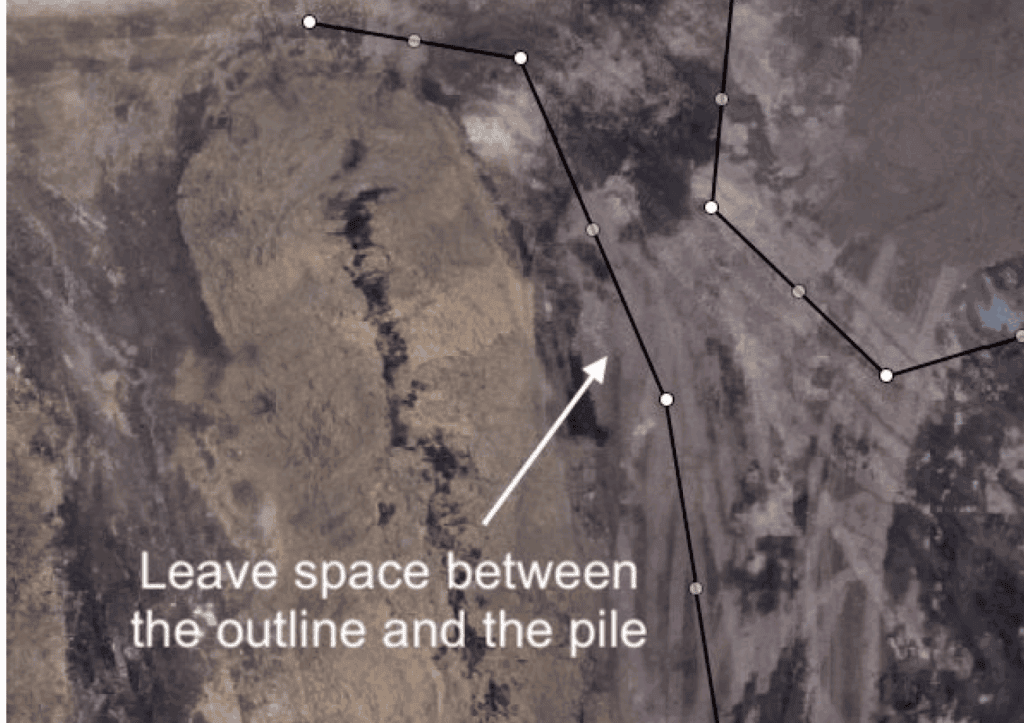
Leave room around each pile on the outlines to include several feet of ground. Outlining piles directly along their toe may cause a section of the pile base to be discarded from the total volume.
Adding New Piles #
Our service automatically tags all of the piles that it can detect. On occasion, a pile will be missed and will need to be manually outlined.
- Click the hand tool and pan/zoom on the map to the pile with the missing outline
- Click the draw button and your cursor will turn into a crosshair when hovered over the map
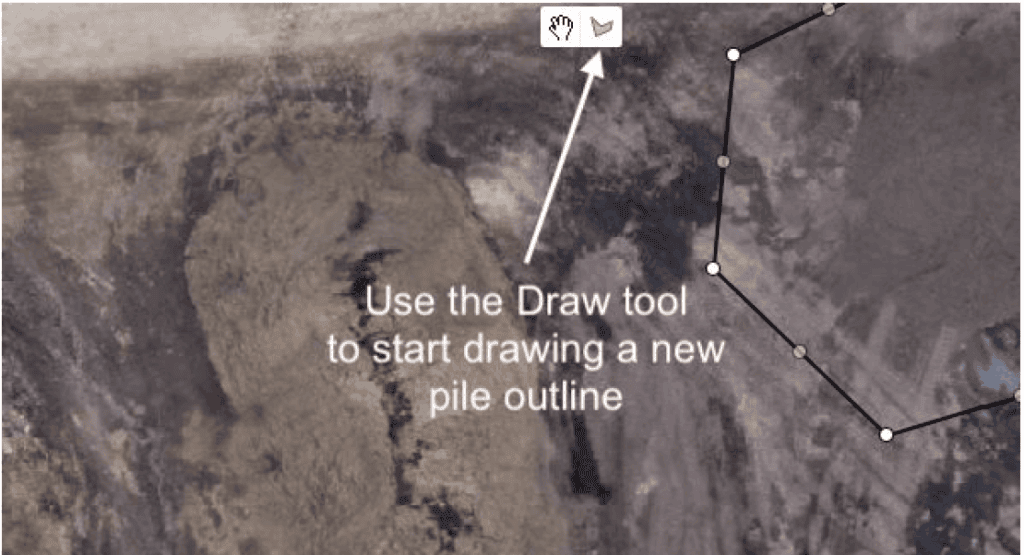
- Click around the pile to start building the outline. Leave space between the outline and the pile. Outlining on the pile toe may cause materials to be missed in the measurement.
- Double click on the last vertex or click on the first vertex and the outline will complete itself
- The product dialog pop-up will appear, select the product and click Okay
Pile Outlining Tips and Best Practices #
Follow these simple guidelines to ensure your aerials are properly tagged. Not following these guidelines can lead to inaccurate measurements.
Tag Each Pile Separately #
Occasionally you may have a group of piles that are all the same product. Each pile should be outlined separately. Outlining all of the piles together may add extra volume due to our system including bumps or extra material in the areas between the piles.

Splitting a Pile #
Two commingled piles sometimes are outlined as one. You may delete the outline and “split” the pile into 2 piles. Ensure to line up the common side outlines.

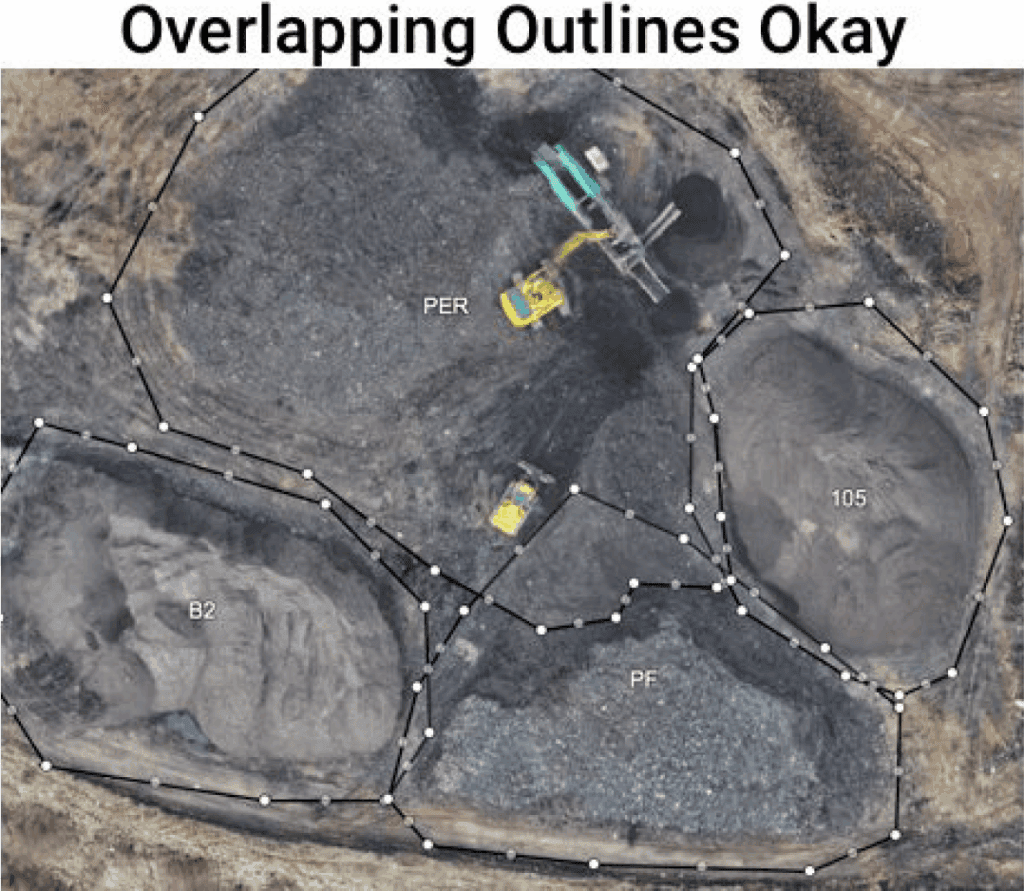
Overlapping Pile Outlines #
Pile outlines may overlap each other when piles are placed close to each other on the map. Only the target pile in the center of the outline will be included in the measurement.
Combined piles should be separated to improve toe coverage confidence.
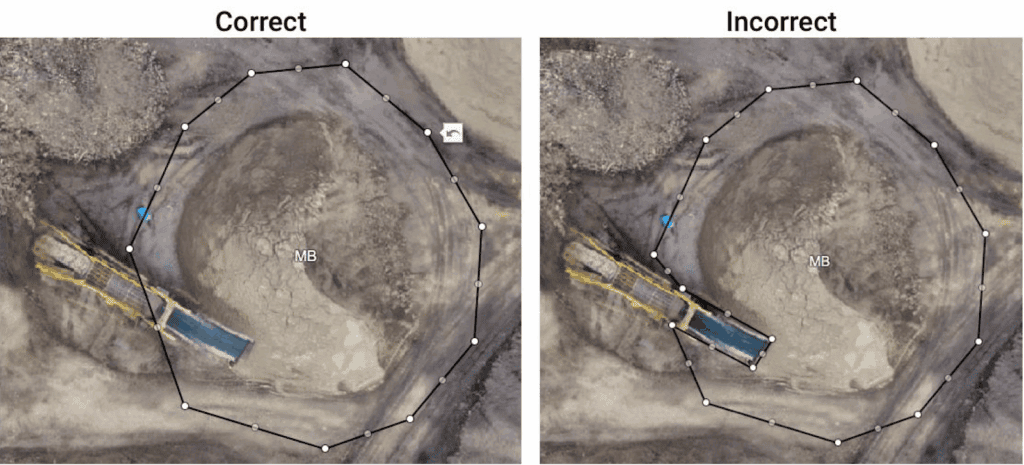
Do Not Outline Around Equipment #
Equipment captured in the pile outlines will be excluded from the measurement total. Outline piles with equipment the same as you would outline other piles.